Showing posts with label ipadology. Show all posts

Wednesday, 29 April 2015

Googd ideas from Twitter: iPad Rules Lock Screens


I love Twitter!  I find the best ideas by browsing my hashtags #fslchat and #langchat!  If you don't follow those groups, you are missing out!  I find great activity ideas, and classroom management ideas-- and more recently tech integration and management ideas.  This idea came from the blog:
Technology Erintegration.  I am so happy I found this blog!  So many great ideas.


In this article, she talks about 5 ways to use iPad backgrounds in the classroom.  The idea I loved (being a middle school teacher) is using the lock screen as a rule reminder.  The above picture is the lock screen I made for my FSL ipads.  Here's a close up of one of the screens:


I have the reminders for proper iPad ettiquette, a note on agreeing with the rules before the students unlock the screen, and in the top corner, a little banner that shows the iPad number of my set.

I struggled with whether or not to put the rules on the screen in French, but I opted for English because I want the students to understand the rules to which they are to agree before using the technology.  Also, students should read the TOA (terms of agreement) before anything they click on the internet, so its an opportunity to teach digital citizenship too. I think in the future, I will do a bilingual lock screen, but for now, I thought it would be more useful for my students in my Core classes to have the rules available in English. 

This idea was a hit at my school!  We are now in the process of creating lock screens for the Learning Commons sets of iPads.  Do you think this is a useful idea for your school's tech?

Monday, 9 March 2015

Les notes visuelles/ Sketchnoting in FSL Part 2

As a sort-of bridging unit, my class and I learned a bit about the value of sketchnoting, and how to start the process.  As a class, we found out that sketchnoting is counter to the notetaking we've been taught for most of our education, so we have to learn step-by-step about creating visual notes.


We looked at the major themes in sketchnoting: 5 elements of drawing (les 5 éléments), creating personalized icons (les îcones), containers (les cases), people (les personnes), and structure (la structure). For each section, we had a brief lesson and then a lot of practice using some of the worksheets I created.

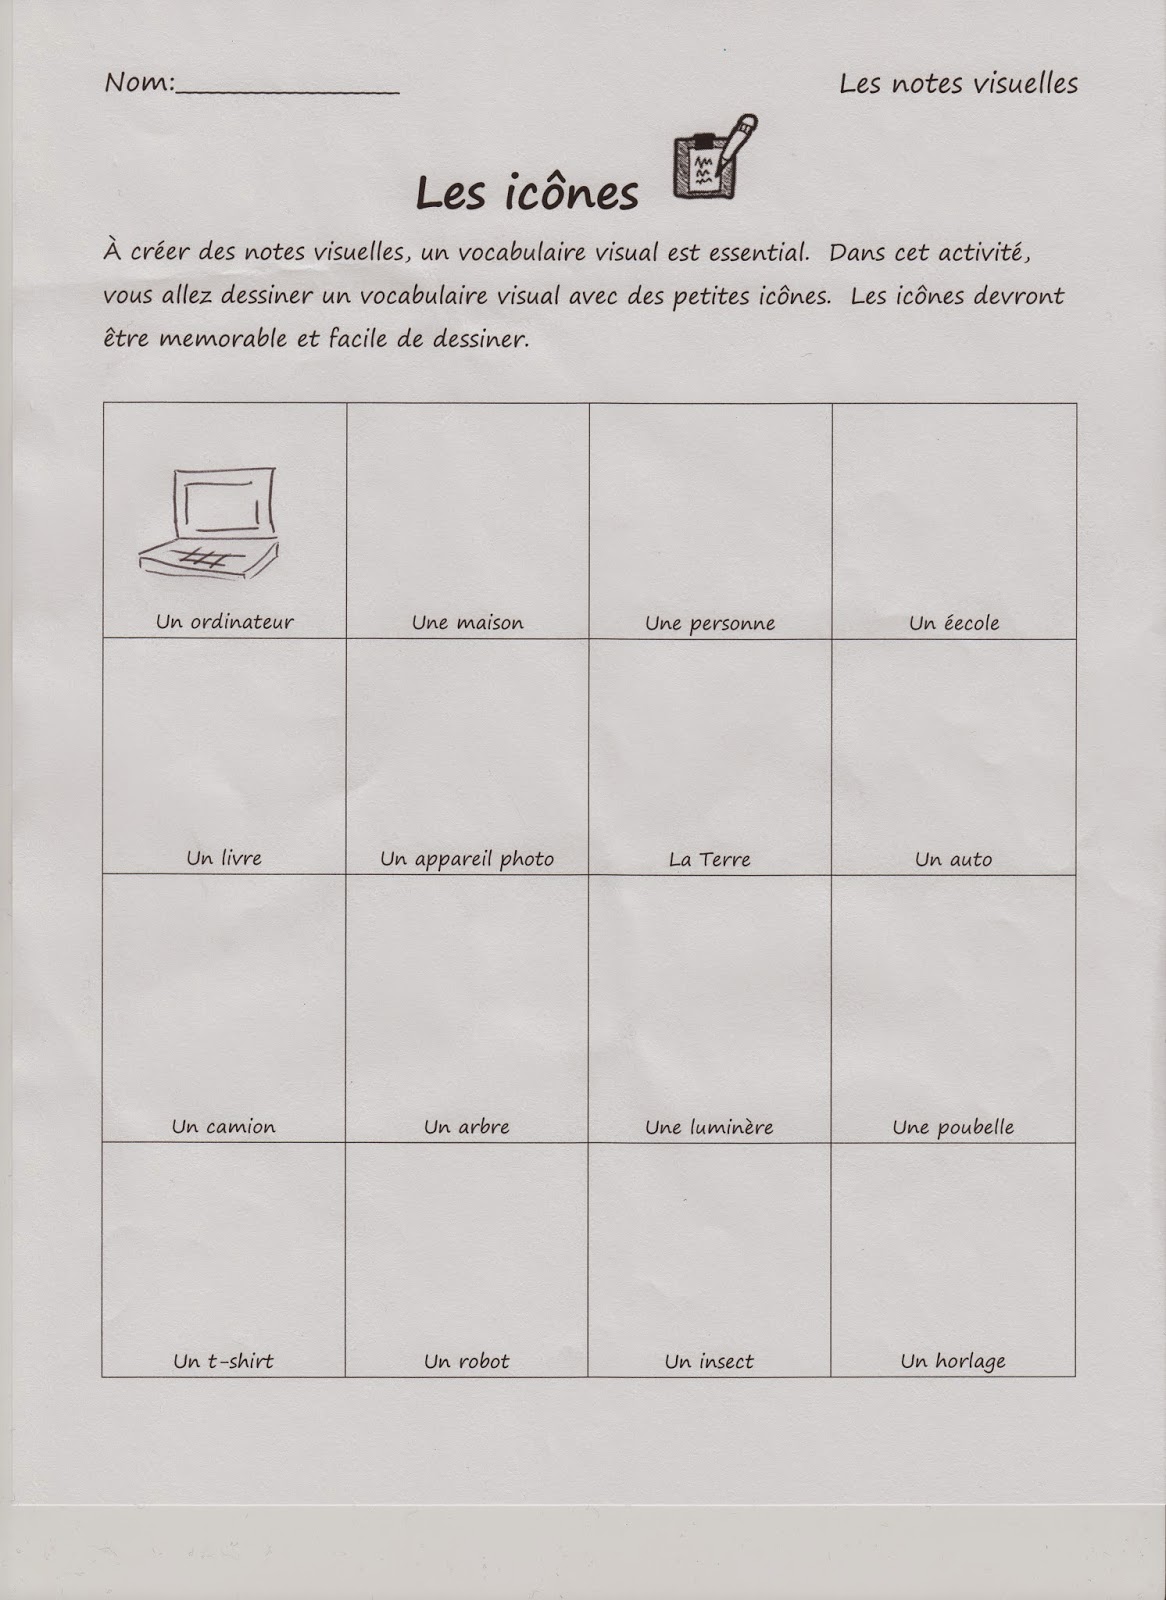
 Here's an example of the worksheet we used to create our personal icons.  What we learned is that sketchnoting is about replacing some parts of our written language with a more visual one.  In order to be successful at that, you need to have a visual vocabulary ready so that those substitutions can happen almost automatically.

To get us started, we created a visual vocabulary for the words and ideas we thought we would use most often.  the goal was to make these icons simple and memorable so that when we heard these specific words, we would recall our icons and use them instead of the words.

To help my students understand what an icon is, and why we would use them, I created a short video for the students to watch about "Les îcones":


Our final activity looked at structure.  I think that this is the most difficult part of sketchnoting.  In order to choose a structure, one has to recognize the patterns in the speakers presentation.  To keep things simple, I taught my students about 7 structures that one can use for any sketchnote without recognizing the structure of the presentation.  For this acticity, students had to either retell their day, or choose a story and retell it through a sketchnote.  Here is the example I made:

 
Students were to use all of the elements of sketchnoting that we learned.   Now that we have moved onto researching about La Francophonie, my students are using sketchnoting to record some of the information they find.  The sidebar we took to explore sketchnoting has been really helpful to my students.  I even use it more in my personal notetaking and found it helps me tackle difficult concepts.  If you are interested in using some of the worksheets I have made, help yourself!

******************************************************************************
Click on the links below to go to a downloadable PDF of each worksheet:


5 éléments worksheet

Les îcones worksheet

Les cases worksheet

Les personnes worksheet

La structure worksheet


Tuesday, 2 December 2014

My very useful YouTube channel


One thing that I use in my class (a lot) are videos.  I find its a good way of starting my class; it gets my students listening and thinking in French, and its fun.  I have been collecting the videos I show on my YouTube channel.  If you don't have a YouTube channel, I would strongly encourage you to start one!  They are great!  Any video that you find, and want to use later, you can save it and organize your collection of videos into playlists.  There is no limit to the number of playlists or videos you have on your channel, so just add them on.

To get a YouTube channel, all you need is a Google login.  If you have a Gmail account, you already have what you need to sign up.  Another plus is that any other channels that you subscribe to are in the side bar of your page.

For my video collection my vids are organized by subject or theme for FSL class. Every time I find a new video while I'm surfing online, or a colleague sends me a link to a great video, I throw it into my playlist (depending what its about.)

I also share my YouTube channel with my students.  Listening to French videos is great practice.  Some of the videos I show are really funny, so the students like to watch them again, or share them with their family.  I have a link to my YouTube channel on my class blog.

I love the ability to pull up a video to highlight a point, or introduce a new concept.  One of my student's commented that I seemed "to have a video for everything.  It's pretty cool." That endorsement works for me.

If you want to have a look at my playlists and videos, my YouTube channel can be found at here.

Friday, 31 October 2014

Vlog: How to Kahoot! (Updated with a new idea)


Hi everyone!  Here's a short video that I recorded to show you how easy it is to make a and use Kahoot.

Kahoot is a great web-based program to enhance student leaning.  I have used it as an assessment tool, and as a review tool.  Students really enjoy the game aspect of the activity, and there are a number of tools that educators may find useful.  As an assessment tool: I have used Kahoot as an assessment of learning, and as assessment as learning.

Assessment of Learning:  Kahoot's quiz game is a great and interactive trivia-style question and answer game.  Students sign in, read the question and answer.  Because points are awarded, students don't readily share the answers (in my experience).  During the game, students get real time feedback about why their answer was right or wrong from you and other students.  After the game, Kahoot has an option to download the results of the game into an Excel spreadsheet.  The information included on the spreadsheet is the student's name, the number of questions they answered correctly, the number of questions they answered incorrectly, and each response for the questions.  This can be printed and saved in your gradebook.  As a class, we like to look at the results together and talk about why we answered the way we did.  A great tool for enforcing metacognitive strategies.

Assessment as Learning:  My students are working on a project in which they create their own Kahoot quizzes for the class.  Students must write and assess various questions for their quiz, they must demonstrate understanding by adding pictures or videos for each question, and then they must present the game to the class for them to play.  As a group, we assess the efficacy of their quiz as a study tool for our theme using a class-created criteria.  From the student generated questions, students practice the material repeatedly, but in different and interesting and engaging ways.  

In order to make Kahoot work in your class, each student needs access to a tech device that connects to the internet.  I teach intermediate, so many of my students have cell phones, so that's what we use.  I have played Kahoot in a computer lab as well, and it was effective.

My students love playing Kahoot.  I can't keep them in their seats.
I really love Kahoot for French class.  The students are engaged, and actively reading and discussing the questions in French.  I hope that you try it. Please tell me if you do!

How else could Kahoot be used in the FSL classroom?

**********************************************************************************

UPDATE: One of my co-workers had a really great idea about using Kahoot for a listening comprehension quiz using video.  I thought the questions was great, so here it is with my response:

Question: 
Hi Stephanie,

Thanks for posting this video. I've started using Plickers which is a similar quiz/survey type app. The students really enjoy it and it's been a fun way to do a quick assessment.

What I really like about Kahoot however is the feature of being able to include pictures or even video. From your video it seemed like you are able to display a video before the quiz begins. If that's possible, I'm thinking it could be perfect as an oral comprehension quiz. I can have the students watch a video and then answer a series of questions. Can you let me know if that's possible.

Thanks, DS

  
Response:
It is possible to do that... But. The video is obscured by the prep information for logging onto kahoot. So the students would really have to listen well. But the video plays over and over until you start the game, so students would get amp,e time to listen and sign on. The only other thing is that the video must be on youtube to add it to the game. So you would have to upload it there if you got it from somewhere else.

Within the game, you can add videos before questions as examples or supports, but, it is still in the early beta of testing, and can be slow, or the video can chunk in and out. I've used video in the game twice and once it was flawless, the other time it kicked some of my students out. The second time I may have used too many videos. So there are a few options to use it for listening comprehension. What I usually do is watch the video outside of Kahoot, and then add clips to support while students are playing. Hope this helps! I'm going to add this discussion onto my blog, because that was a great question! Thanks,
DS! 


(**These opinions are my own, and Kahoot has not paid me to be their cheerleader.  I just really love their program!)

Tuesday, 14 October 2014

Do you Lino?


Just a quick post today on an online app that I have been using in class.  Lino is a virtual post-it board that students and teachers can add to from anywhere (provided there is wifi and a device handy.)  Teachers need to create an account for lino, but its free and can link to you google account.  (If you don't have a google account, get one!  Its free and so many apps and programs can link to it.  You don't need 609 names and passwords. )

Lino is a great tool for brainstorming, reflecting and anywhere you would use post it notes.  In the above pic, my classes were using it as a reflection tool and exit activity.  Since I discourage the use of English in class, students can post their exit ticket in English.  Students are encouraged to read other students posts for ideas/ inspiration or to help them create their own reflections.

Lino is great for Inquiry-based activities.  Students can create post-it notes on the information they find and post it to the board for others to see.  The board updates in real time, so students see what is being posted as it happens.  I like to assign colors for each class or group so that I can keep track of who posted what note.


Today we are going to use Lino as a vocabulary collection point for our review on adjectives.  Students will be able to add words and pictures to create a living list of adjectives that they can access.

What I really like about Lino is that I can post the boards to our class blog:

This is the blog zoomed out so that you can see the header and the board.  You can change the size of the Lino board by changing the size settings in your post.
Students then only have to access the class blog to post their notes.  You can embed the lino screen only any website, Lino provides the codes for you to do so.  You can also hotlink to your boards, so if you use Twitter or another messaging platform to communicate with you students, you can add the link there for students to access the Lino boards. Pro-tip: make sure that you set the publicity setting to public, otherwise it will not show the board.  Another pointer, if you are using a mobile device the board will prompt you to download the app, but it is not necessary.  Just click the small "close" x in the top right corner and to will take you right to the board.

Another plus to Lino, is that you do not have to download the app to use the program.  It is accessible through the website www.linoit.com.  As long as students have a browser on their device, they can add to Lino.  The Lino app makes it easier to add to boards, but for creating and editing, I like the online version better.  Its more user-friendly and easier to navigate.

A third positive for Lino is that it keeps all your boards together so that you can look at them later.

This is a handy little app to use in class or outside of class.  I found that some of my students were adding to the Lino boards outside of class time, which is a plus!

What are some ways that you could use Lino in your class?


Saturday, 2 August 2014

À la carte: Anchor Chart Binder and Online Notebooks

This next school year, I will officially be on a cart, traveling from class to class to teach FSL. I say officially, because I was pretty much on a cart this year, even though I did have access to a FSL classroom.  Most of the time, I chose to teach the students in their homerooms.  

So, I am already used to being the "traveling show" when it come to teaching.  Over the past year, I was looking for ways to make my traveling easier for my students.  Any FSL teacher knows that there are many benefits of having a dedicated space for teaching French.  I want to be able to provide some one those benefits, even though I move from place to place.  

The biggest challenge for me was finding space to keep the anchor charts that I made visible for my students.  I have 2 ways that I do this: the first is heavily tech based, and the second is my Anchor Chart Binder.  

Anchor Chart Binder


On my cart, I have two front cubbies on the bottom, and in there I keep a binder that hold every anchor chart I make.  During class, I have the student designated as the class reporter for the week, take a picture of the anchor charts that we make/ use.  Then the pictures are uploaded to Google Drive, or emailed to me, and I print to to add to the binder.  


This is an example from one of my grade 4 classes.  We were learning our learning goals and success criteria, and so the class reporter took a picture of the chart.  The binder itself is organized into sections: verbes, vocabulaire, and unités (with the title of the unit able to be written in erasable marker on the tab.)  

The students were really good about getting and using the binder if they needed to review an anchor chart for some reason.  This binder was especially usuful for students that were away, and needed to catch up.  I could also photocopy certain charts for students to have access to with their notes or for activities in which I needed to differentiate for some students.

Notes on Google Drive


When we started to implement the use of iPads into our classes, I moved away from the binder to an online binder of sorts. I still had a class reporter, but now instead of printing, I uploaded the charts to a shared drive so students could access the charts and other notes from anywhere.  

Students can access the online notebook from my class blog, but I also created a shortened link so that students can memorize the link easily.  (create a shortened link through services such as bit.ly or Google URL shortener.) Once in the shared drive, they can browse and download the notes that they need on their device.  I hope to cut down on the amount of paper we use. (I have a secret quest to become paperless.  More on that another time though.)  More, I want the students to be able to access the information they need anytime and anyplace.  


Through my school board, students have their own Google Drive space where they can download the notes they want to keep to their own drive.  Ideally, students would download the notes as we use them to their own drive to pull up in class etc.  

Pluses for using Google Drive are that the app is really user friendly.  My grade 4s and 5s last year were experts at navigating the classes shared Drive and uploading their projects and pictures to it.  It was a great tool because we had to used shared computers and iPads.  Students did not need to store anything on the devices and they had access to the projects and notes for homework or to work on when they finished other work.   More than this though, using services like Google drive are great inter-subject learning.  And knowing how to use cloud storage services is a crucial skill for our students as they grow and education become further and further entrenched in the technology that is readily available to us.  It was really exciting to see the students use the technology in FSL.  They knew that it was important, and it was engaging.  They know that they need these skills, and more they want to learn these skills. 

Having set up my binder and Google Drive for my students this upcoming year, I am looking forward to being "à la carte."  I will get to keep my online resources up to date, and hopefully it will become an integral resource for my students.

How do you manage sharing information to your students without a dedicated class space? Have you thought about going paperless?  

Monday, 14 July 2014

Summer Learning- HWDSB Summer Institute Series

Our board has some great opportunities for Summer learning.  One of the PD sessions that I attended was a mini-course on using technology in the classroom.

This was a jam-packed, 2-day PD session where teachers from my board was able to explore topics relating to using technology and transforming technology in the classroom.  Of the number of sessions that were available I decided to attend the crash courses on using the ePortfolio app, Explain Everything app, using Inquiry-based learning in the classroom, using the Binder app and what to do with tech when the iPad goes down.  All the groups were very small, and allowed for a lot of one-on-one attention, which was great when you are frustrated and having a tech problem.  The second day sessions that I attended were mainly about my own development as a teacher; Collaboration, and the iPad as a teacher tool.  In these sessions we were given more time to practice using the tools, and trouble shooting, which I found helpful.

I could talk about all the sessions, but I have attached my notes for anyone interested, so I'm just going to focus on the sessions that made me think even further about my own teaching: the "when the wifi goes down" crash course and the second day sessions about collaboration and a singular iPad classroom.  

"When the Wifi goes Down"

The techie-teacher's nightmare.  This has happened to me a few time this year.  On my cart, I usually keep a back-up activity for when this happens.  What was great was that the instructor Jared Bennett (http://jarbenne.commons.hwdsb.on.ca)  provided us with lists of apps and resources, and little tricks to prepare for the common occurance of wifi-lessness.  (See my notes for that list.)

The challenge for me, however, is that my classroom is not one that has enough resources for students to have their own devices to use.  I can plug in my iPad using an adaptor to project the image, and that doesn't need wifi.  I would have liked to learn a little more about those physical things that I could use; are there any more?  

Overall, I wish that the session was longer!  But, Jared's really good about answering my questions via email (no matter how silly or inane) so I'm not worried about when I inevitably have more ideas and questions.

"Using the iPad to Collaborate"

Even though this session was about how to teach the students how to collaborate, I found this session useful because I can adapt it to use for planning with my colleagues.  Everyone is busy, and it is difficult to organize time to plan together, with the programs we used and learned about, that is something that could no longer be a challenge.  Most helpfully, we were given over an hour to apply what we were learning on a question.  I learn best through application, so I was greatful for the opportunity to work through the process with support.  

"The One iPad Classroom"

The afternoon session was a great introduction in using the iPad as a teacher tool.  To start the session, Jared noted that for schools with limited access, the teacher's should be the one's that are equiped with the tablets first.  I found that I agreed with this idea; Jared introduced a number of ways that the teacher could use the iPad to provacate and engage the students, instead of passing a few devices around.  

I appreciated that Jared took the time to display how a teacher can use the iPad as an organizational tool.  I felt that there was enough new information for me who is comfortable with using tech in the classroom, that I still took so much away from the ideas that he introduced.  I'm looking forward to trying some of the things he outlined throughout the summer.

What PD are you hoping to complete this summer?


If you would like to have a copy of my notes, click this link:

https://docs.google.com/document/d/12JUVp9cfIbJmP7URgS853wuO3Z0kF8MtnZS1hDS8oOE/edit?usp=sharing

Hope you find them helpful!

Thursday, 22 May 2014

Updated "Apps I Use" Page

I have updated the "Apps I use" page with some apps that I have found to be engaging and useful in my FSL classes.  With each entry, I try to give some idea as to how I used this app in my classes.  I love finding new uses for apps, though, so if you have another idea, please share!  I would love to use apps my students are familiar with in new ways.

I have made my list available as a downloadable PDF for sharing.  Just follow this link to access the document.  I will be adding to this list as I create new ideas with new apps, so keep checking back!